In this help article you will find step-by-step instructions how to set up your bldg3.com mailbox on your Android device using the Gmail app.
IMAP configuration instructions:
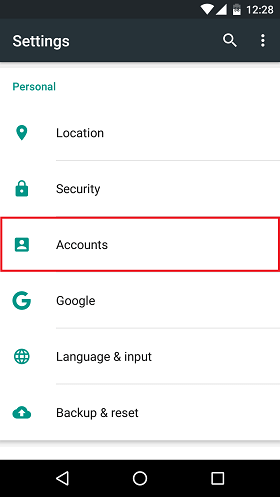
1. Open the Settings app on your device. Find the section for Accounts and tap on it.
2. Then tap Add Account.
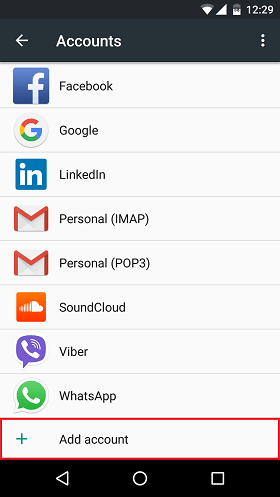
3. Tap Personal (IMAP).

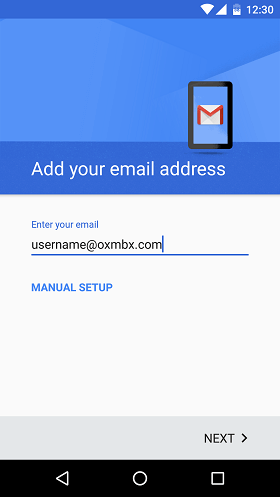
4. On the Add your email address screen, enter your email address and tap Next.
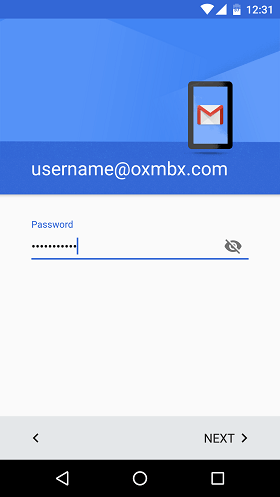
5. On the next screen, enter your password and tap Next.
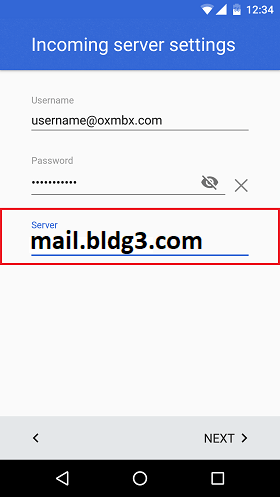
6. On the Incoming server settings screen, enter the following information. Then tap Next.
Username: Your full email address
Password: The email password you use to sign in to your account.
Server: mail.bldg3.com
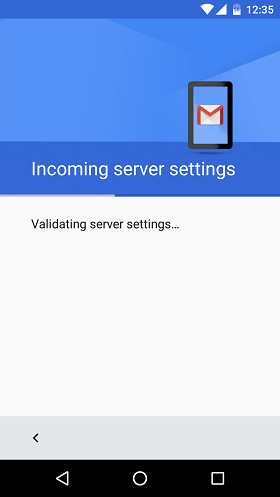
7. The Gmail app will verify if your incoming server settings are correct. If they are incorrect, please edit them and make sure that they are properly configured.
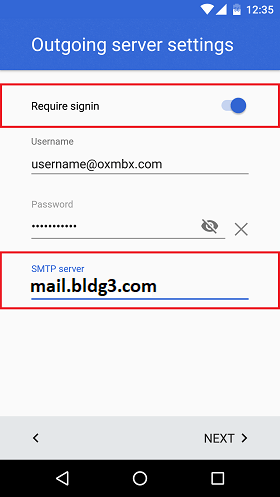
8. On the Outgoing server settings screen, enter the following information. Then tap Next.
Require signin: On
Username: Your full email address
Password: The email password you use to sign in to your account.
SMTP server: mail.bldg3.com
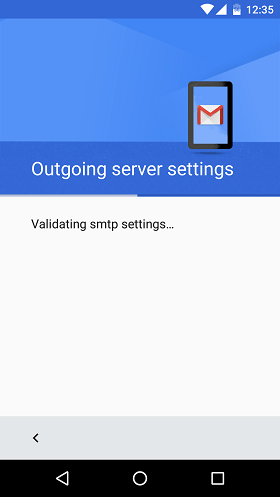
9. The Gmail app will verify if your outgoing server settings are correct. If they are incorrect, please edit them and make sure that they are properly configured.
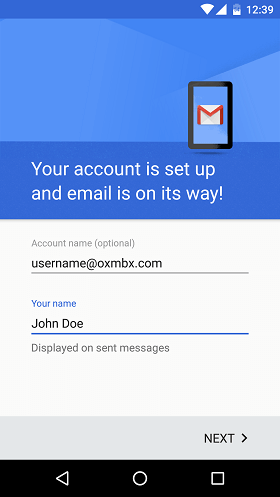
10. On the next screen you will be able to personalize the account options.
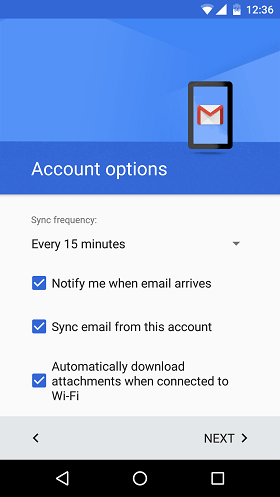
11. After a successful account creation, configure the Account name and enter Your name that will be displayed on sent messages. Tap Next to finish the account setup.
How to check if you are using our secure settings?
When you set up your email account on your device, Android automatically uses SSL encrypted connection.
To make sure that your email account was set up using our secure settings, you can compare the settings in the Gmail app with our correct settings. Please follow the step-by-step instructions below.
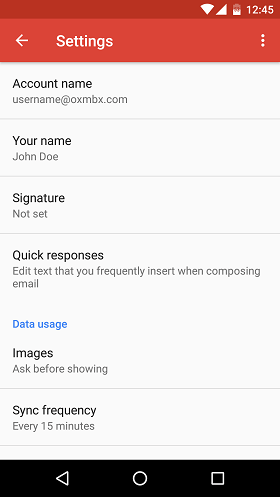
1. Go to Settings > Accounts > Personal (IMAP) > Account settings.
2. Tap your email account to see the account information, such as the Account name, Your name, Signature and Sync frequency.
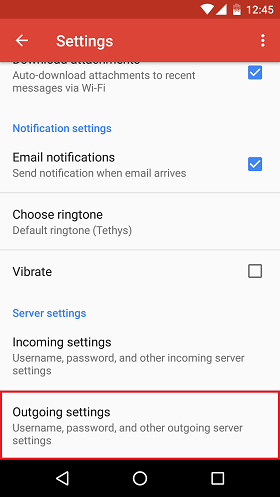
3. Scroll down to the Server settings section and tap Incoming settings.
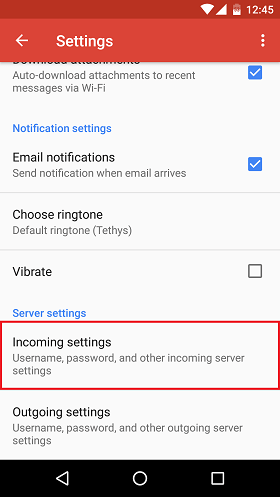
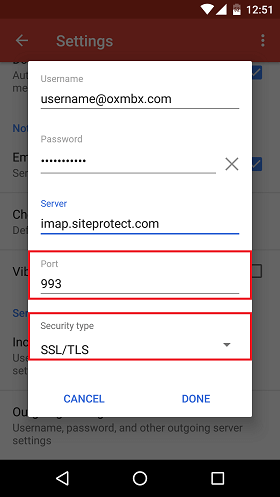
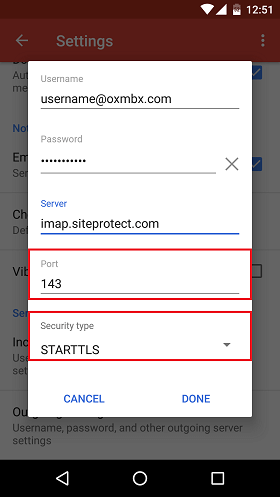
4. A pop-up will appear. Verify that you are using the settings below.
a. The default settings are: Security type SSL/TLS and Port 993.
b. The recommended settings are: Security type STARTTLS and Port 143.
5. Then tap Outgoing settings to review the outgoing server settings.
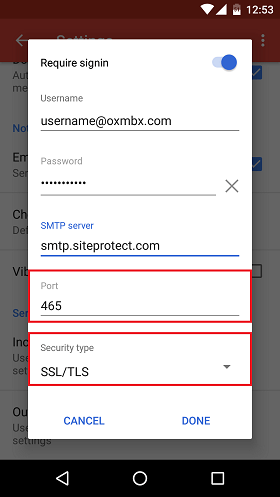
6. A pop-up will appear again. Verify that you are using the settings below.
a. The default settings are: Security type SSL/TLS and Port 465.
b. The recommended settings are: Security type STARTTLS and Port 587.

The content of this page was copied from Hostway Help Center on June 11 2021